Publish a new post
Create a post, write the content, add a cover image and click Publish to put it on your website.
Updated October 9, 2026
1. Create the post
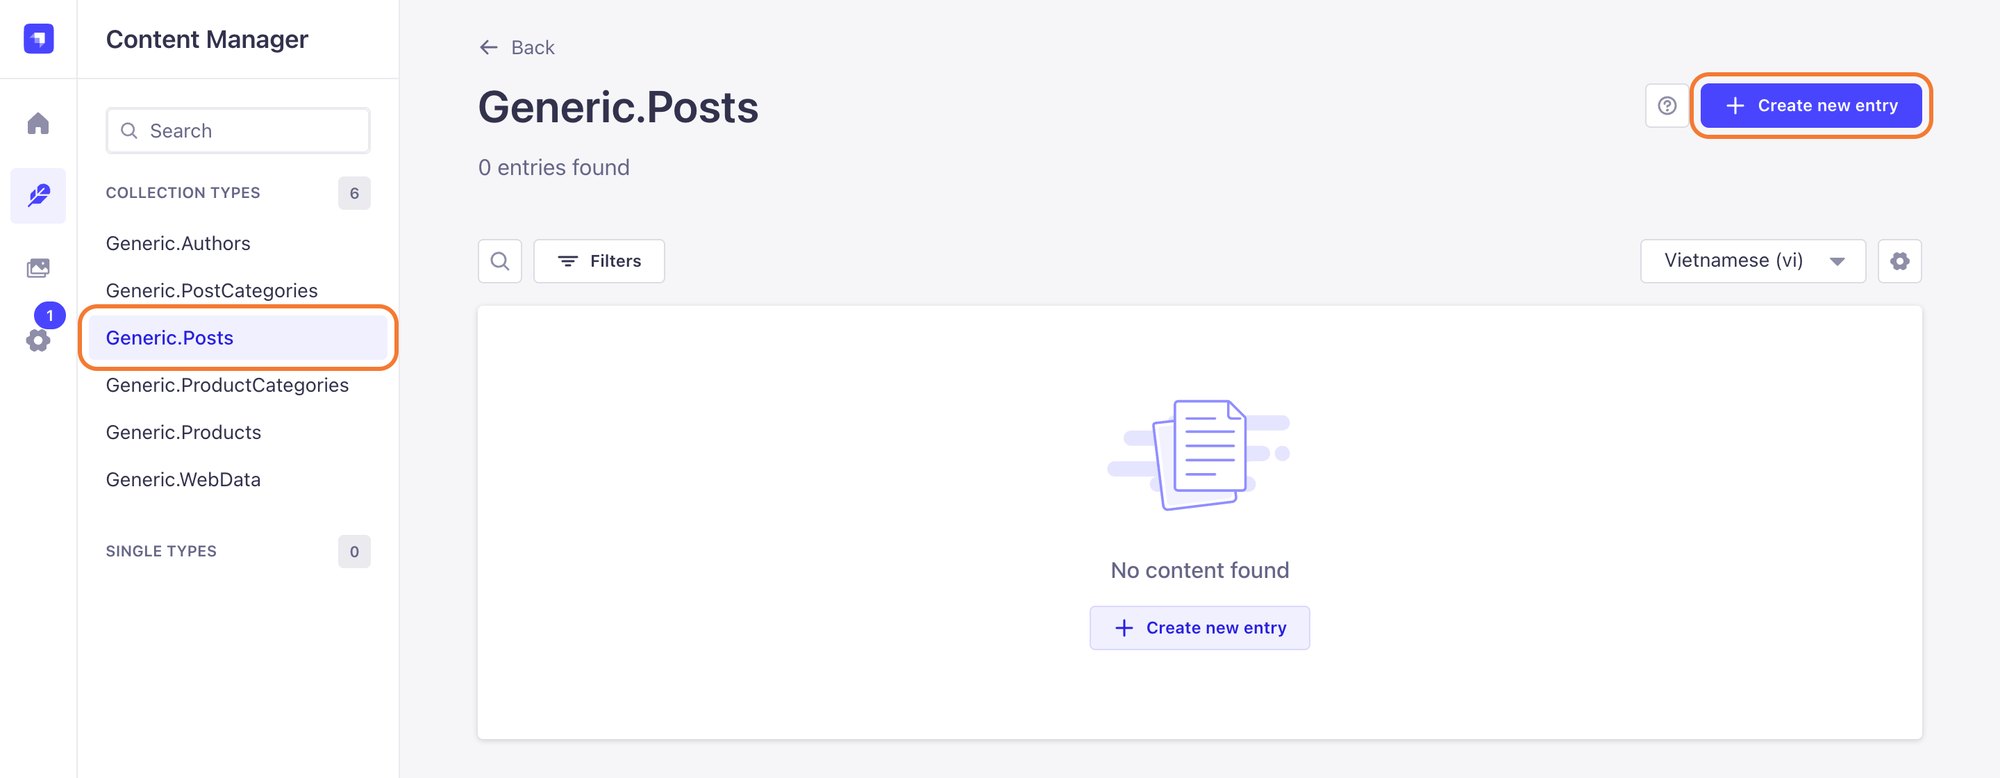
Go to Content Manager → Generic.Posts, check the language box shows the language you want, then click Create new entry.
2. Fill in the main details
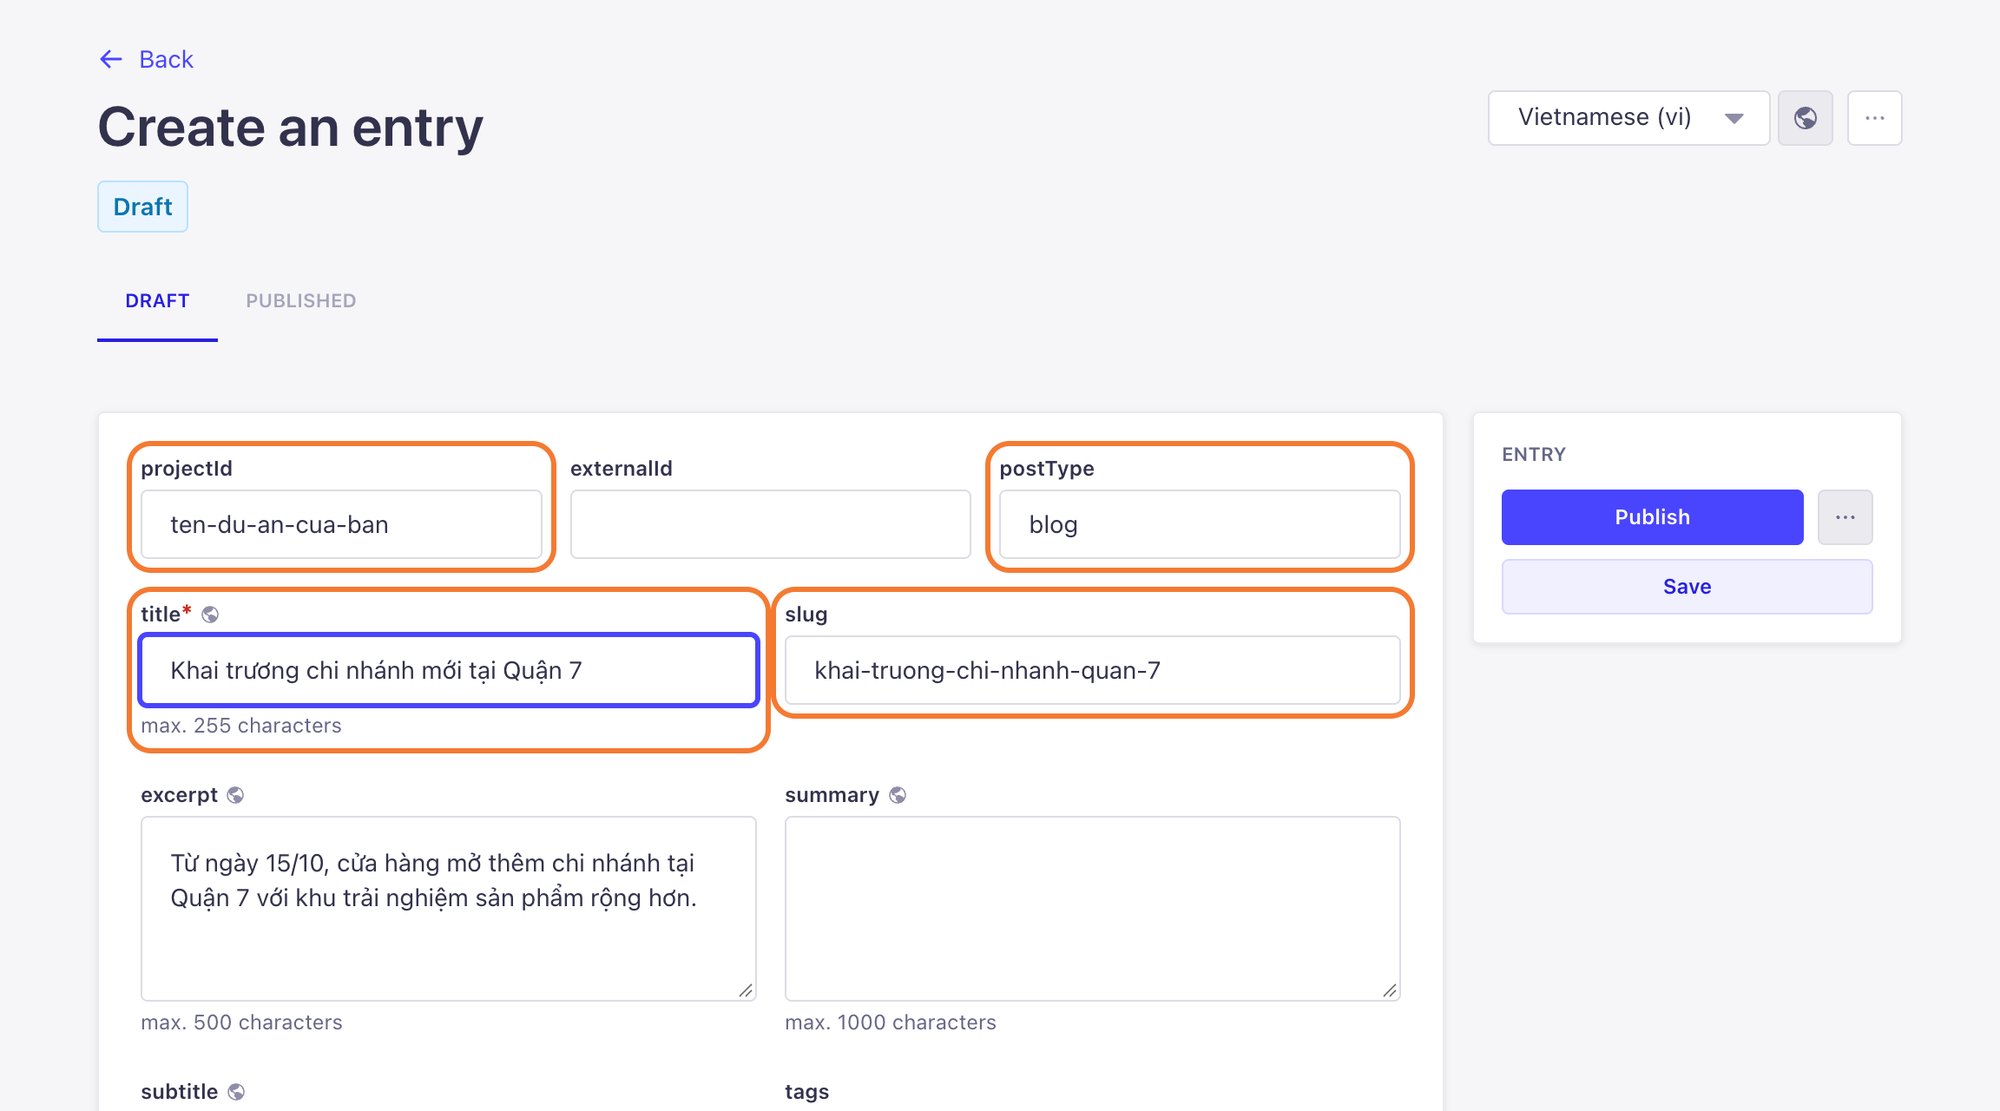
- projectId and postType: see The two required fields.
- title: the post title.
- slug: the end of the post's web address, in lowercase with hyphens, for example
new-branch-district-7. Every post needs its own slug. - excerpt: a one or two sentence summary, often shown in post lists.
3. Write the content
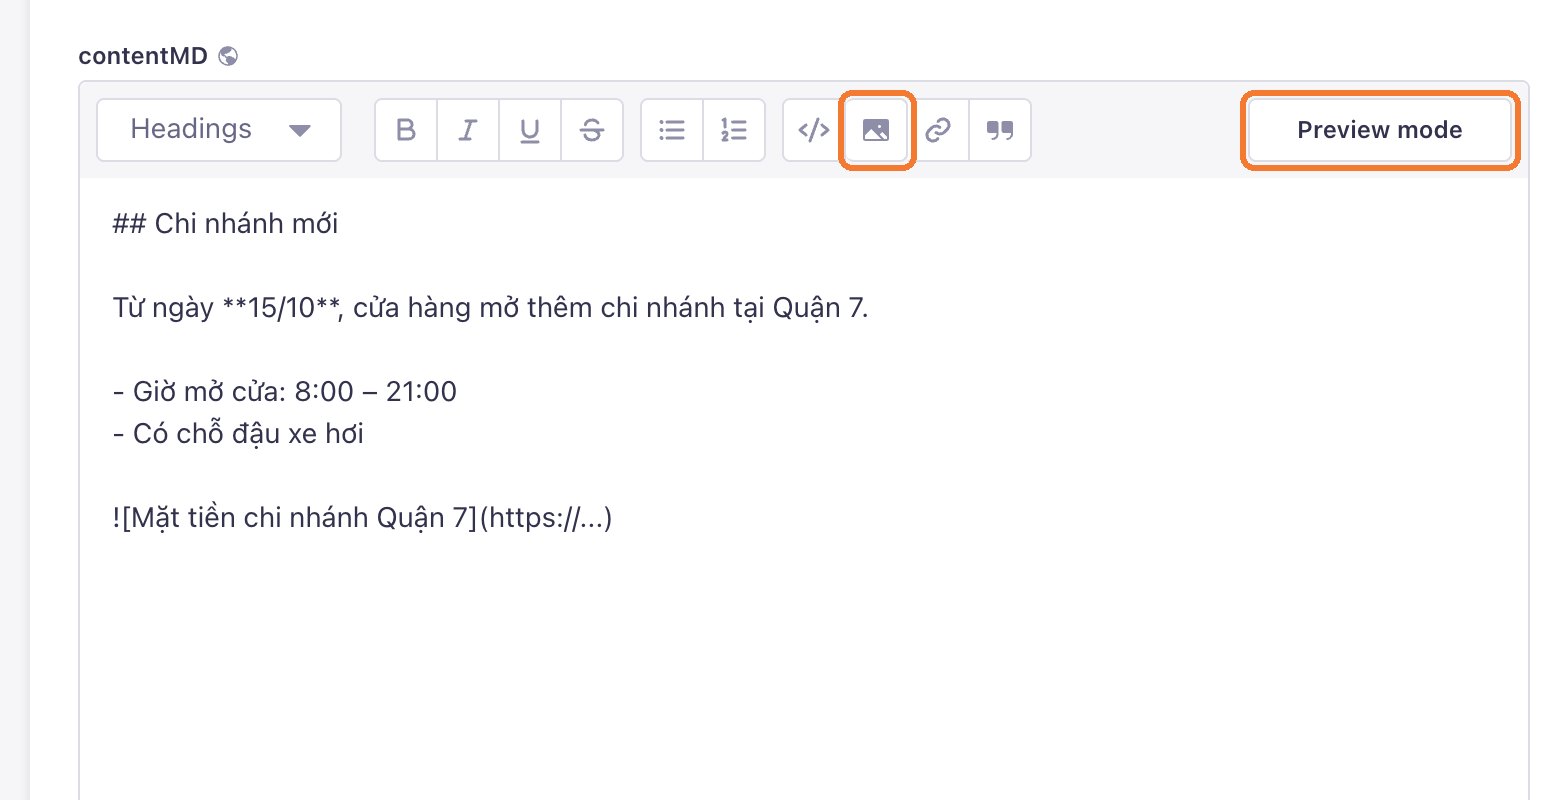
Type the content in contentMD. Use the toolbar for headings, bold text, lists, links and images. Click Preview mode to see how it will look.
4. Cover image and category
Click heroImage to choose a cover image. Pick a category in categories if your website groups posts. See Add images and Post categories.
5. Publish
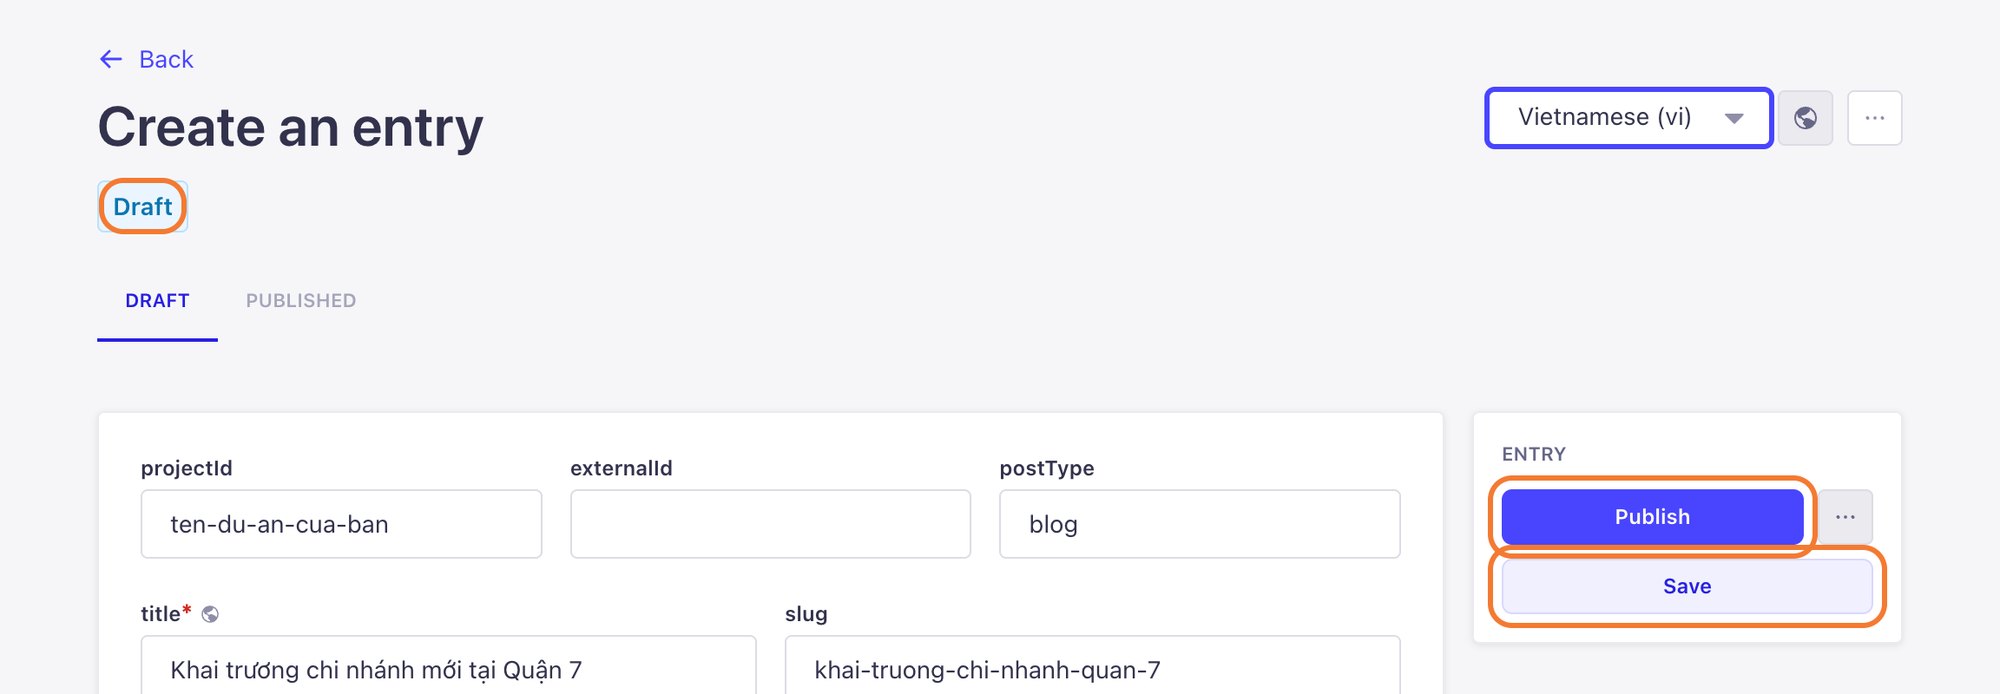
- Save only stores a draft. The post does not appear on your website yet.
- Publish puts the post on your website.
After you click Publish, the website can take a few minutes to update. Still not there after a while? See My post is published but not showing.
Still need help
Can't find the answer?
Message LaPage on Zalo with what you are trying to do and a screenshot if you have one. We will walk you through it step by step.